How to Install an Espagnolette Bolt: A Complete Step-by-Step Guide
- by Hamilton Brass

Understanding Your Espagnolette Bolt Installation
Enhancing your home security doesn't have to involve complex systems or professional contractors. Installing an espagnolette bolt is a practical DIY project that can significantly improve the security of your doors and windows. Whether you're replacing an old bolt or installing one for the first time, this comprehensive guide will walk you through each step of the process. With the right tools and our clear instructions, you'll be able to complete this project confidently, even if you're new to home improvement tasks.
What Is an Espagnolette Bolt?
Before diving into installation, it's important to understand what an espagnolette bolt actually is. An espagnolette bolt is a locking mechanism commonly used on doors and windows, particularly French doors and casement windows. Unlike standard locks that secure at a single point, espagnolette bolts feature multiple locking points along the door or window edge, providing enhanced security and a tighter seal.
Types and Components of Espagnolette Bolts
Espagnolette bolts come in various designs to suit different applications:
Surface-mounted bolts: These attach to the face of the door or window and are generally easier to install for beginners.
Mortise bolts: These require recessing into the edge of the door or window, offering a more streamlined appearance but requiring more advanced installation skills.
Shoot bolt systems: These extend bolts into the top and bottom of the door frame for additional security.
The main components of an espagnolette bolt system typically include:
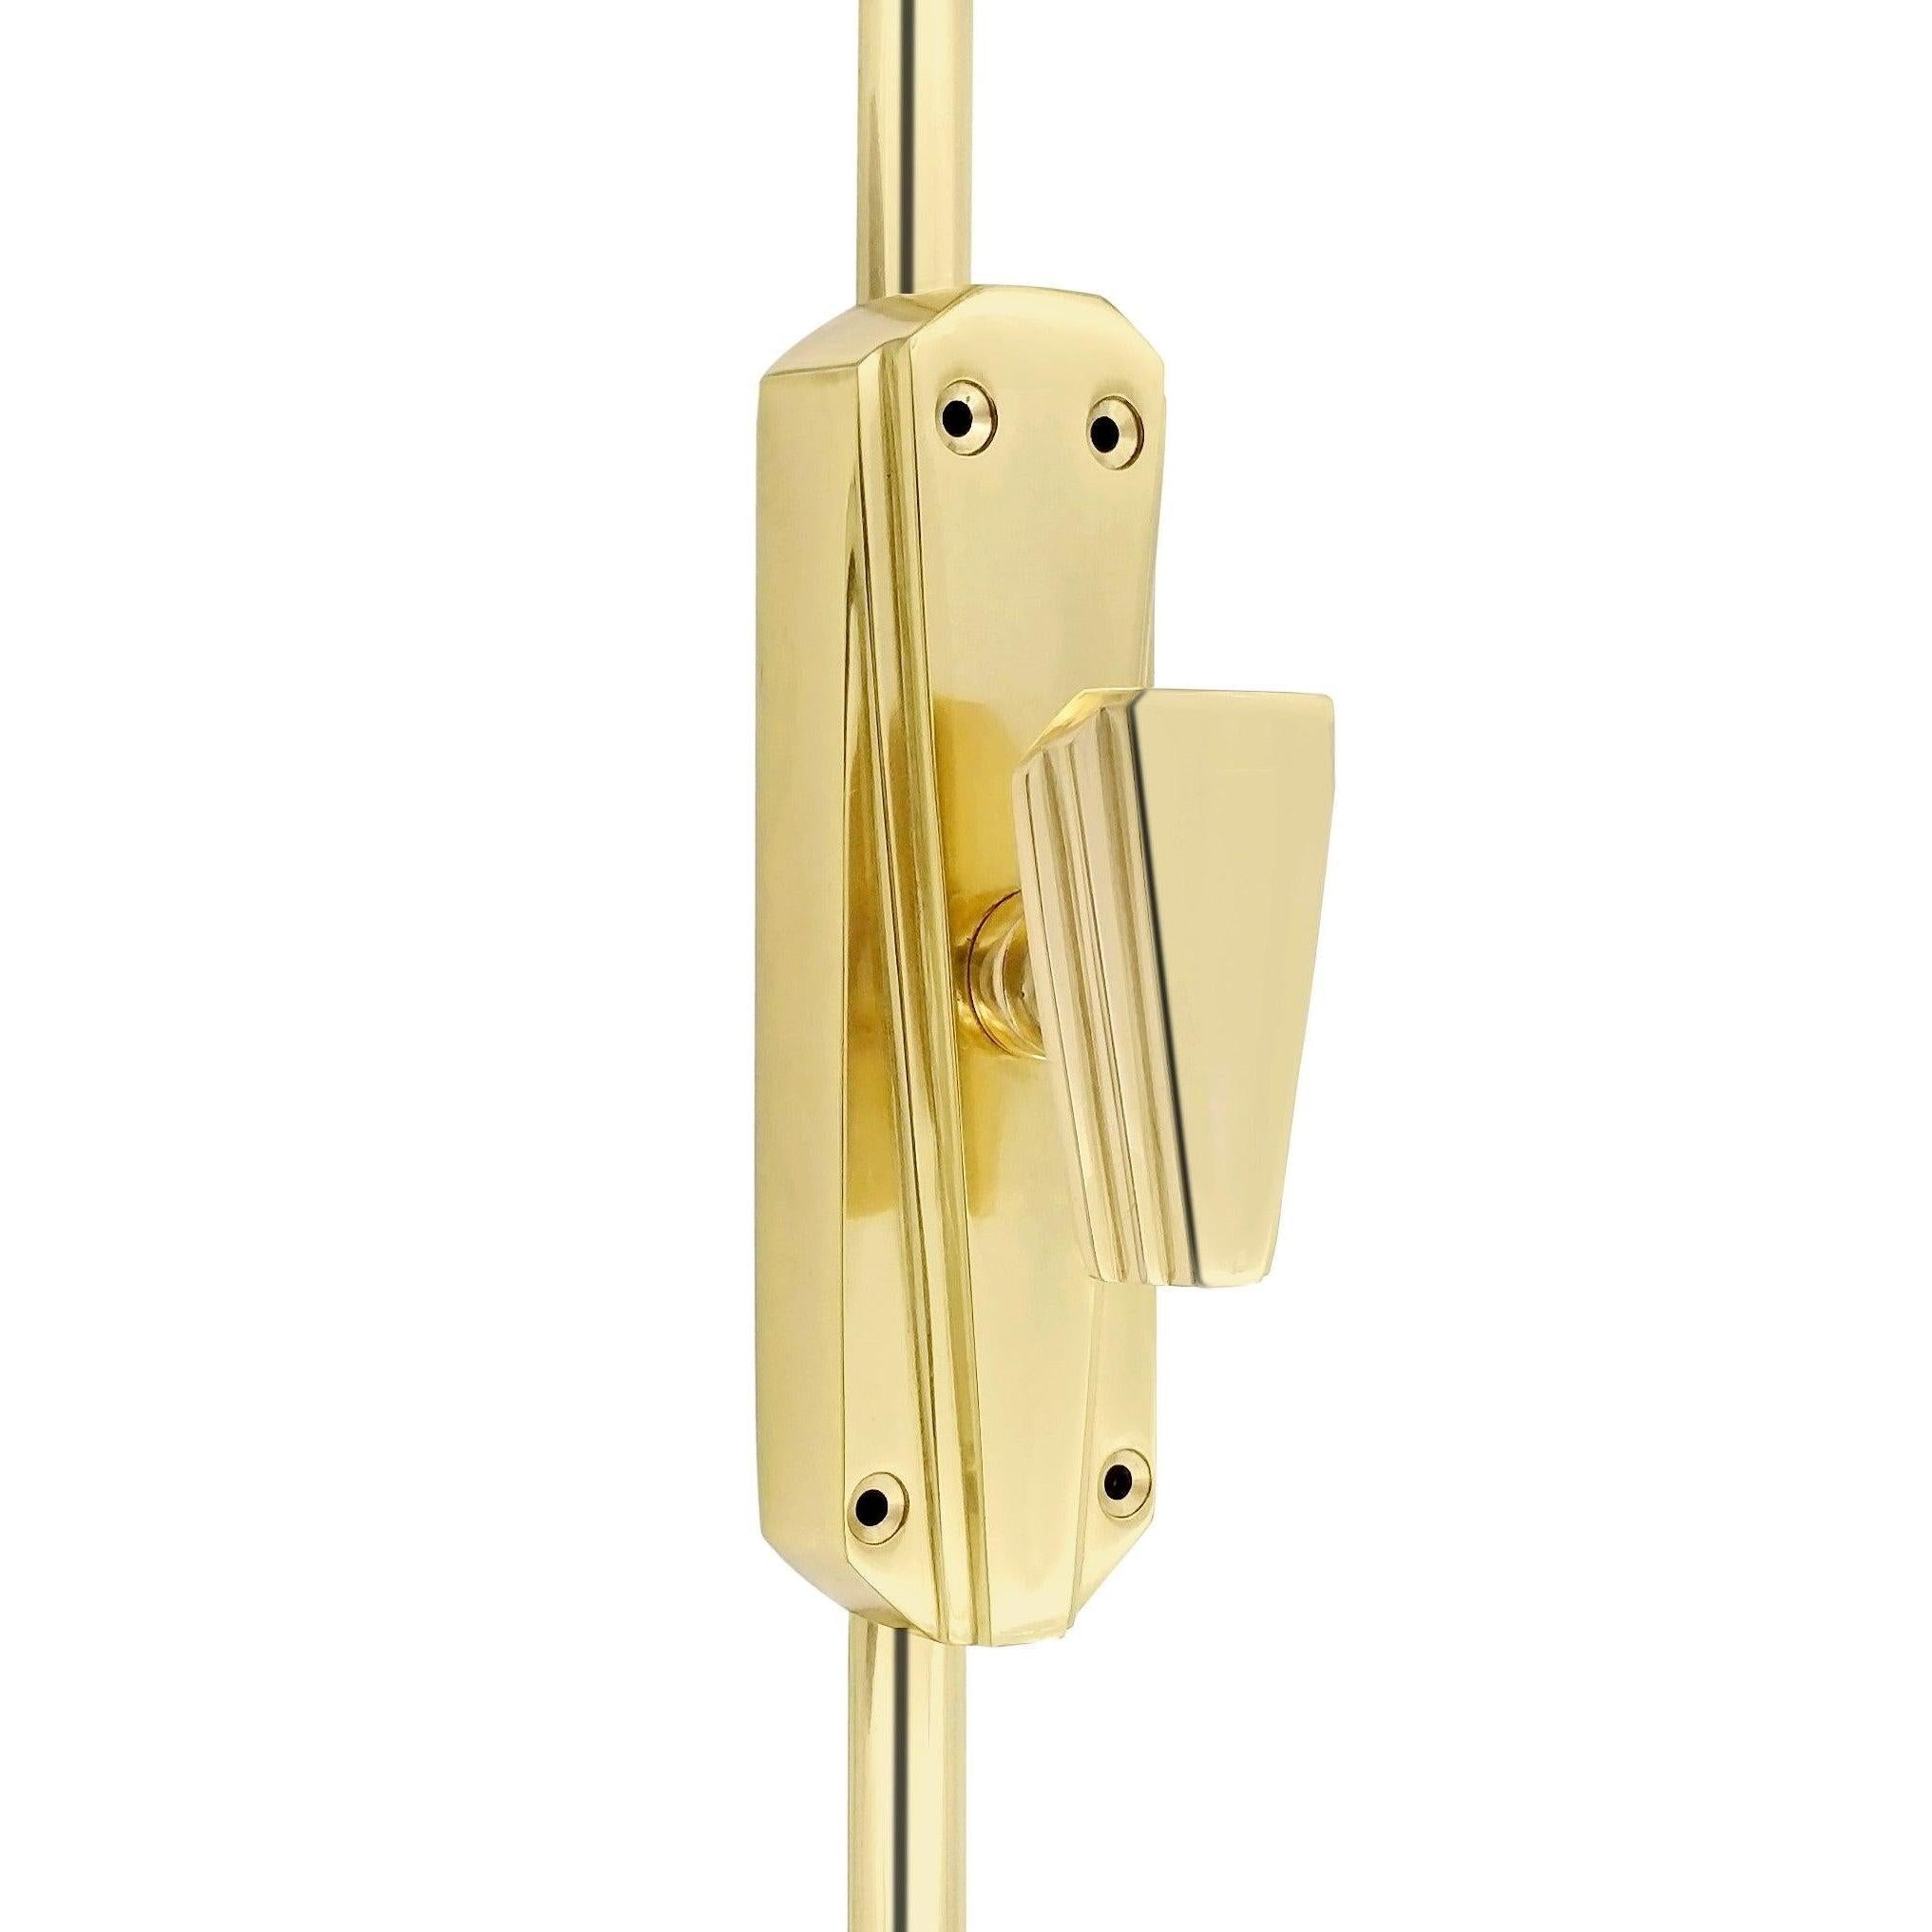
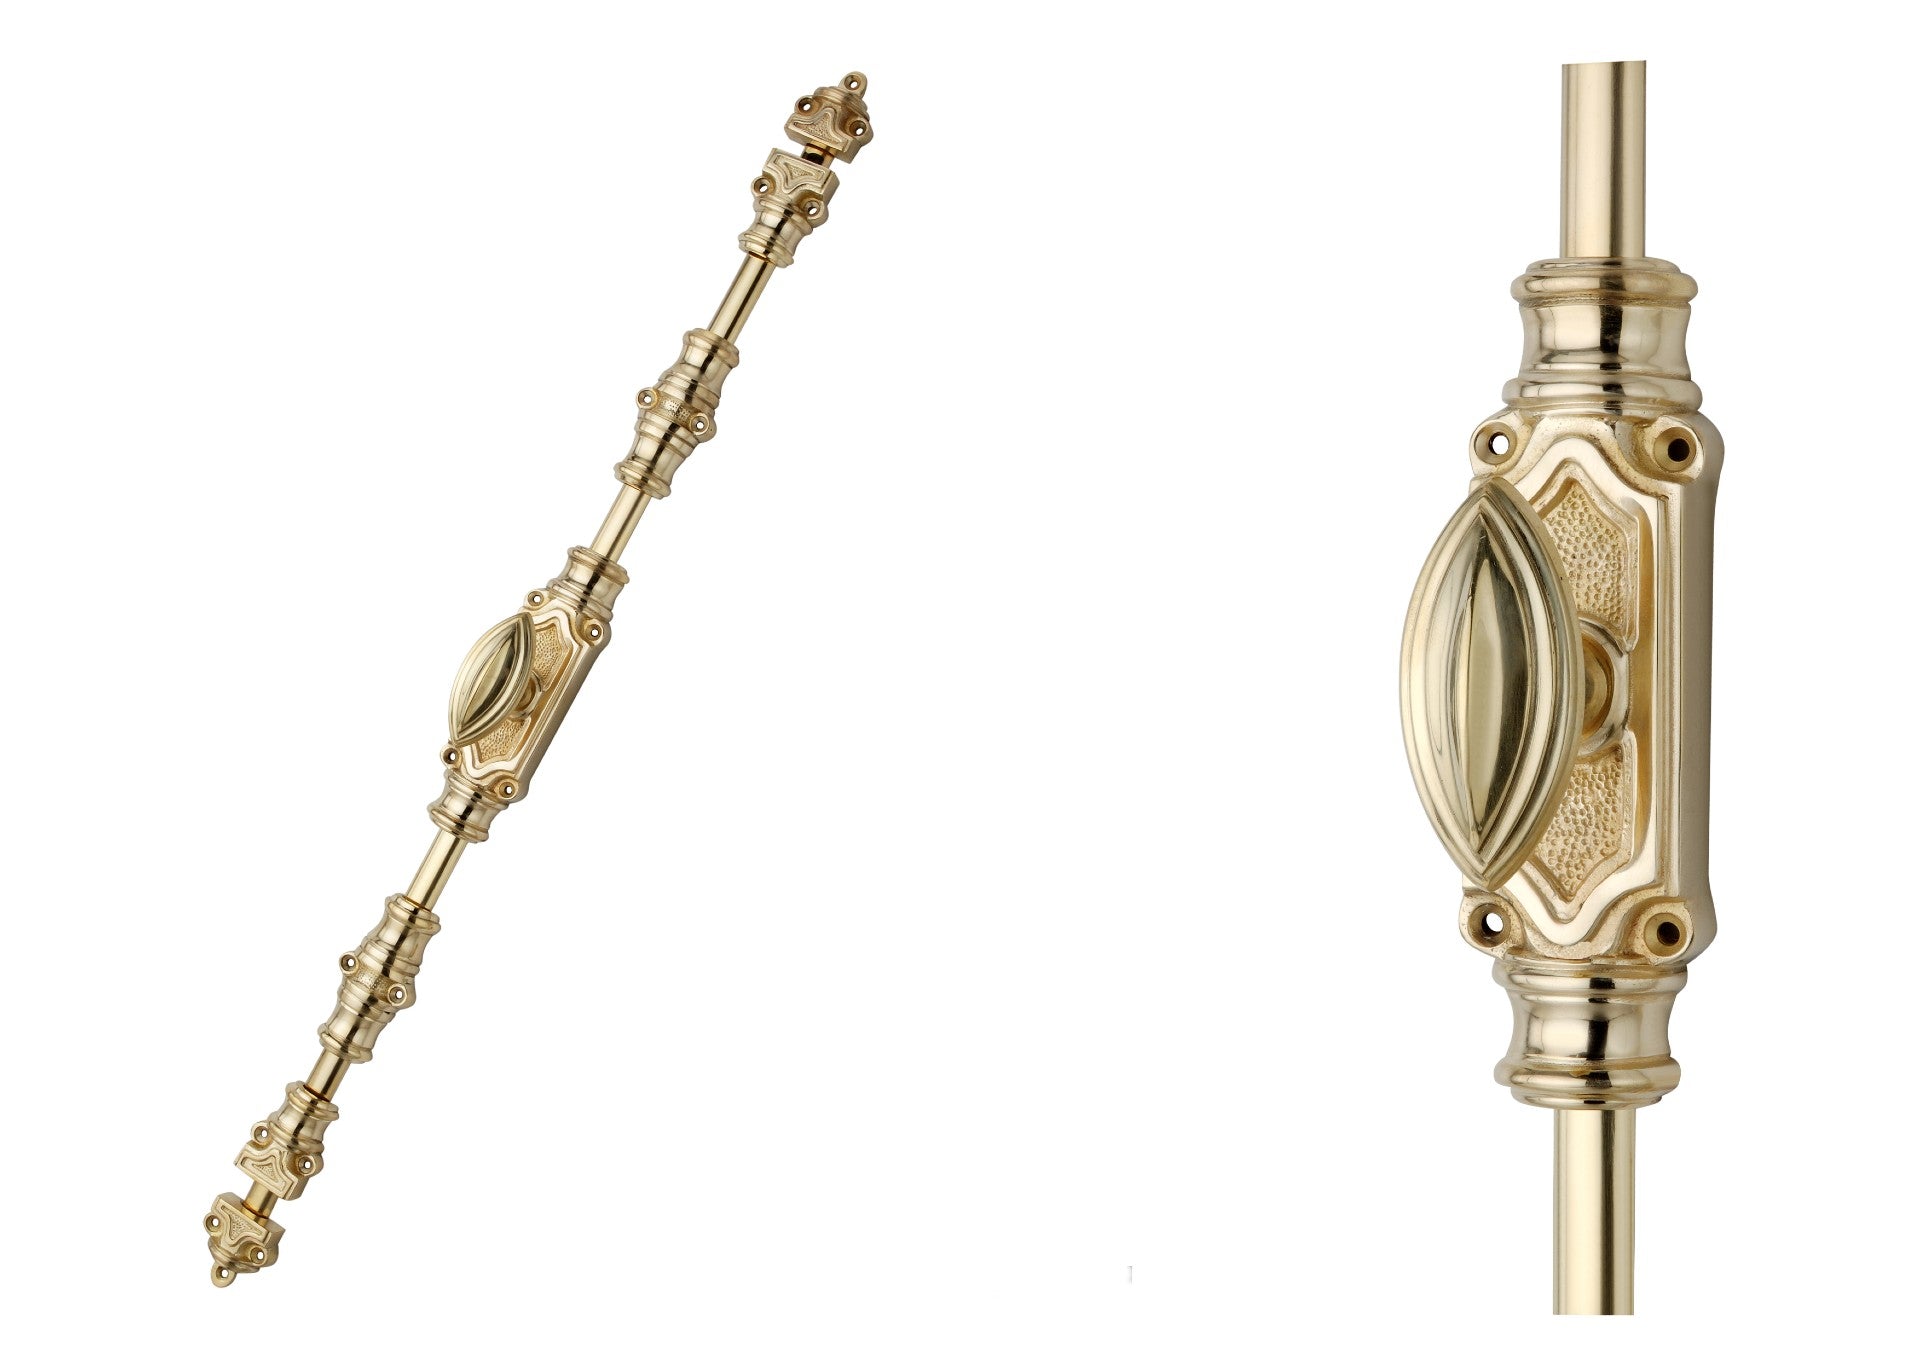
The central locking mechanism with a handle or lever
The rod or rods that extend when the handle is turned
Keep plates that receive the bolts when locked
Mounting screws and hardware
End caps for a finished appearance
Preparation and Tools Required
Proper preparation is key to a successful espagnolette bolt installation. Gathering all necessary tools and materials before you begin will make the process much smoother.
Essential tools for installation:
Tape measure
Pencil
Drill with appropriate bits
Screwdriver (Phillips and flathead)
Chisel (for mortise installations)
Hammer
Level
Utility knife
Safety glasses
Materials needed:
Espagnolette bolt kit (appropriate for your door/window type)
Screws (often included with the kit)
Wood shims (if needed for alignment)
Measuring and Marking
Accurate measurements are crucial for proper espagnolette bolt function:
Determine the height at which you want to position the handle. Typically, door handles are placed about 36 inches from the floor, but adjust as needed for your specific situation.
Measure and mark the positions for the top and bottom keeps on the frame. These should align perfectly with the bolt rods when extended.
For doors, ensure the espagnolette bolt is the correct length for your door height. Some systems can be cut to size if necessary.
Mark all screw hole positions clearly before drilling.
Use a level to ensure all markings are perfectly vertical, as any misalignment can cause operational issues later.
Installation Process
Now that you've prepared everything, it's time to install your espagnolette bolt. Follow these steps carefully for the best results:
Step 1: Prepare the door or window If you're installing a mortise-style espagnolette bolt, you'll need to create recesses for the mechanism. Use your chisel and hammer to carefully cut out the marked areas to the depth specified in the manufacturer's instructions.
Step 2: Position the main bolt mechanism Hold the espagnolette bolt against the door or window edge at your marked position. Ensure it's perfectly vertical using your level. Mark the screw holes clearly.
Step 3: Pre-drill the screw holes Using a drill bit slightly smaller than your screws, create pilot holes at each marked position. This prevents the wood from splitting when you insert the screws.
Step 4: Attach the bolt mechanism Position the espagnolette bolt over the pilot holes and secure it with the provided screws. Don't fully tighten them yet, as you may need to make adjustments.
Step 5: Install the handle Attach the handle or lever according to the manufacturer's instructions. This typically involves inserting it through the pre-drilled hole in the door and securing it with screws from the opposite side.
Step 6: Mark and install the keep plates Close the door or window and turn the handle to extend the bolts. Mark where the bolts touch the frame. This is where you'll install the keep plates. Open the door, position the keeps at your marks, and secure them with screws.
Step 7: Test and adjust Close the door or window and test the espagnolette bolt operation. The bolts should slide smoothly into the keeps without forcing or misalignment. If adjustments are needed, loosen the appropriate screws, reposition, and retighten.
Step 8: Final tightening Once you're satisfied with the alignment and operation, fully tighten all screws to secure the installation.
Troubleshooting Common Issues
Even with careful installation, you might encounter some challenges. Here are solutions to common problems:
Bolts don't align with keeps:
Check that the espagnolette bolt is installed perfectly vertical
Verify that the keeps are positioned correctly
Consider using shims behind the bolt mechanism or keeps for fine adjustment
Handle is difficult to turn:
Ensure the mechanism isn't overtightened
Check for any obstructions in the bolt channels
Apply a small amount of lubricant to moving parts
Bolts don't fully extend or retract:
Verify that nothing is blocking the bolt path
Check that the mechanism is properly aligned
Ensure the door or window is fully closed when testing
Door or window doesn't close properly after installation:
Check if the espagnolette bolt is protruding too far
Verify that the keeps aren't positioned too deeply into the frame
Ensure the door or window hasn't warped
Maintaining Your Espagnolette Bolt
To ensure your newly installed espagnolette bolt continues to function properly for years to come:
Periodically check and tighten any loose screws
Apply a small amount of lubricant to moving parts annually
Clean any debris that may accumulate in the keeps
Test the mechanism regularly to ensure smooth operation
Enhancing Security Further
Now that you've successfully installed your espagnolette bolt, consider these additional security measures:
Install security plates around the bolt to prevent tampering
Consider adding hinge bolts on the hinge side of doors for complete security
For ground floor installations, consider window restrictors for added protection
Your Espagnolette Bolt Installation Success
You've now completed the installation of your espagnolette bolt, significantly enhancing the security of your door or window. By following this step-by-step guide, you've not only improved your home's security but also gained valuable DIY skills that you can apply to future projects.
Remember to test your installation thoroughly by opening and closing the door or window multiple times and engaging the locking mechanism from different positions. This ensures that the espagnolette bolt functions properly in all situations.
With your newly installed espagnolette bolt, you can enjoy improved security and peace of mind, knowing that your doors and windows have additional protection against unauthorized entry. This relatively simple upgrade provides substantial benefits in terms of both security and the smooth operation of your doors and windows.